Subtotal $0.00

In modern enterprise application software development, where agility and automation drive success, establishing a seamless CI/CD pipeline is a cornerstone for efficient application management and deployment.
MuleSoft Anypoint platform offers a robust platform for scalable application deployment, and when integrated with Bitbucket’s DevOps capabilities, it enables a highly automated workflow. Leveraging Bitbucket Pipelines, you can automate testing, artifact management, and deployment processes, ensuring MuleSoft applications remain optimized for production readiness.
What is Bitbucket?
-
- Bitbucket is a Git-based platform that enables version control and seamless integration with Atlassian tools like Jira and Confluence.
-
- Bitbucket Pipelines offers a built-in solution for automating testing, building, and deploying applications, streamlining the CI/CD process. Here is an overview on the steps involved.

Figure 1: Overview
This blog will outline the key steps to implement a robust and production-ready CI/CD pipeline
Step 1 : Let’s move forward with creating a Bitbucket account at https://bitbucket.org/product, and then set up a workspace and project with a repository.


Step 2: While creating Repository make sure you give your branch name as per your requirement. We will use the same branch name in the bitbucket-pipelines.yml steps. Here I have created my main branch as “dev”.

Once your repository is created, it should look something like this.

What is SourceTree?
-
- SourceTree is Atlassian’s Git GUI client designed to manage repositories.
-
- SourceTree is used to clone the Bitbucket repository, allowing you to manage commits, branches, and merges through an intuitive graphical interface. Once your SourceTree is installed and you open it should look something like this
-
- Download and install https://www.sourcetreeapp.com

Step 1: Click on Bitbucket Cloud, which will open your Bitbucket account in a browser. Once there, click Allow to authorize SourceTree to connect with your Bitbucket account.

Step 2: Click on Continue and then Done, Locate to Remote at the top of your tab and click Clone.

Step 3: You can now clone your repository to a local folder on your system.
How to Configure Anypoint Platform for Deployment
Step 1: Create Anypoint Platform Account:
-
- Sign up for an Anypoint Platform trial account, which offers sufficient vCores for deploying MuleSoft applications. This account will be used for deploying apps to CloudHub or other environments. You can still use an active Anypoint account.
Step 2: Create a Connected App for Authentication:
-
- For secure integration with Anypoint Platform, create a Connected App in Anypoint Platform with appropriate permissions for API management and CloudHub deployment. This allows you to use client credentials for authentication in your pipeline. Alternatively, you can use your Anypoint Platform username and password, though the Connected App approach is more secure and scalable.
-
- To create a connected app, navigate to Anypoint Platform > Access Management > Connected Apps, and then select Create App. Choose the app type as App that acts on its own behalf (client credentials).

Step 3: You can assign the following scopes to define the app’s permissions based on its requirements.

Step 4: Copy your Client ID and Client Secret into a notepad, as you will need them later for the settings.xml configuration.
Creating a Sample Project for CI/CD
-
- Create a sample MuleSoft project to have a simple implementation ready for deployment.
-
- Update your pom.xml to include the Mule Maven Plugin and distribution management. This ensures that the build and deployment are automated using Maven.
Step 1: Your pom.xml should look something like this, these parameters can be dynamic and may vary from user to user.
| <plugin> <groupId>org.apache.maven.plugins</groupId> <artifactId>maven-clean-plugin</artifactId> <version>3.2.0</version> </plugin> <plugin> <groupId>org.mule.tools.maven</groupId> <artifactId>mule-maven-plugin</artifactId> <version>3.8.4</version> <extensions>true</extensions> <configuration> <cloudhub2Deployment> <uri>https://anypoint.mulesoft.com</uri> <provider>MC</provider> <environment>${environment}</environment> <target>${targetName}</target> <muleVersion>4.7.0</muleVersion> <applicationName>${appName}</applicationName> <replicas>${replicas}</replicas> <vCores>${vCores}</vCores> <server>anypoint-exchange-v3</server> <businessGroupId>${businessGroupId}</businessGroupId> <connectedAppClientId>${connectedAppClientId}</connectedAppClientId> <connectedAppClientSecret>${connectedAppSecret}</connectedAppClientSecret> <connectedAppGrantType>client_credentials</connectedAppGrantType> <secureProperties> <anypoint.platform.base_uri>${anypointBaseUri}</anypoint.platform.base_uri> <anypoint.platform.client_id>${anypointClientId}</anypoint.platform.client_id> <aplatform.client_secret>${anypointClientSecret}</anypoint.platform.client_secret> </secureProperties> <deploymentSettings> <http> <inbound> <forwardSslSession>true</forwardSslSession> <lastMileSecurity>true</lastMileSecurity> </inbound> </http> </deploymentSettings> </cloudhub2Deployment> </configuration> </plugin> |
Step 2: The highlighted fields in the pom.xml will be passed as an argument through bitbucket-pipelines during the build and deploy stages. These arguments are used to dynamically configure the build, ensuring the pipeline deploys to the correct environment with the appropriate settings.
(Note: Please refer to the Mule Maven Plugin Release Notes to ensure compatibility between your Maven version and the Mule Maven Plugin version you are using. This is important to avoid potential build or deployment issues. You can find the compatibility matrix in the official documentation; Here I am using Mule Maven Plugin 3.8.4 which is compatible with Maven version 3.8.4. The maven version is defined in Bitbucket-pipelines.yml file)
Step 3: Distribution Management Configuration:
| <distributionManagement> <repository> <id>anypoint-exchange-v3</id> <name>Private Exchange repository</name> <url>https://maven.eu1.anypoint.mulesoft.com/api/v3/organizations/${businessGroupId}/maven</url> <layout>default</layout> </repository> </distributionManagement> |
Step 4: On a Notepad, write down the following settings.xml configuration. Later we can add the settings.xml as a variable to bitbucket repository variables.
| <settings> <servers> <server> <id>anypoint-exchange-v3</id> <username>~~~Client~~~</username> <password>ConnectedAppCilentID~?~ConnectedAppCilentSecret</password> </server> <server> <id>anypoint-exchange-v3-1230c4b56-a878-9fe4-994f-750909d62a3d</id> <username>~~~Client~~~</username> <password>ConnectedAppCilentID~?~ConnectedAppCilentSecret</password> </server> </servers> </settings> |
Step 5: Replace ConnectedAppClientID and ConnectedAppClientSecret in the settings.xml with the values you obtained from the Connected App.
How to Implement Pipelines in Anypoint Studio
Step 1: In the root directory of your MuleSoft project, create a bitbucket-pipelines.yml file. This YAML file defines the steps for continuous integration (build and test) and continuous deployment (deploy to environments).

Step 2: Example of a simple Bitbucket Pipeline configuration:
| image: maven:3.8.4-openjdk-8 pipelines: branches: dev: – step: name: Build Publish caches: – maven script: – echo “Bulding the artifact and publishing to exchange“ – echo $settings_xml_non_prod > settings.xml – mvn -B -s settings.xml clean deploy -DskipTests -Denvironment=${environment} –DtargetName=${targetName} -DappName=${appName} -Dreplicas=1 -DvCore=0.1 –DbusinessGroupId=${businessGroupId} -DconnectedAppClientId=${connectedAppClientId_Dev} -DconnectedAppSecret=${connectedAppSecret_Dev} -DanypointBaseUri=${anypointBaseUri} -DanypointClientId=${anypointClientId_Dev} -DanypointClientSecret=${anypointClientSecret_Dev} – step: name: Deploy script: – echo “Deploying to cloudhub” – echo $settings_xml_non_prod > settings.xml – mvn -s settings.xml clean deploy -DskipTests –DmuleDeploy -Denvironment=${environment} -DtargetName=${targetName} -DappName=${appName} -Dreplicas=1 -DvCore=0.1 -DbusinessGroupId=${businessGroupId} -DconnectedAppClientId=${connectedAppClientId_Dev} -DconnectedAppSecret=${connectedAppSecret_Dev} -DanypointBaseUri=${anypointBaseUri} -DanypointClientId=${anypointClientId_Dev} -DanypointClientSecret=${anypointClientSecret_Dev} |
Step 3: These are the argument variables that we are utilizing within the pom.xml. They will be dynamically injected during the build process via the Bitbucket pipeline to configure deployment settings accordingly. Ensure the pipeline is configured to automatically deploy to Sandbox or Production based on the branch.
How Does Version Control and CI/CD Workflow work?
Now that you have made changes into your pom.xml and bitbucket-pipelines.yaml add your project to your cloned repository and commit those changes to your feature branch.
Step 1: In SourceTree, create a new feature branch to work on the MuleSoft project. This helps keep your development work separate from the main branch. In my case, the main branch is named “dev” instead of “master”.

Step 2: You can name your new branch, check if your Current branch pointing to master (dev in this case), and then Create Branch

Step 3: After creating the branch, navigate to the File Status tab in SourceTree and select the files you want to commit. This allows you to stage the changes before committing them to your feature branch

Step 4: After staging your files, add a commit message in the comment field, and then click Commit to finalize the changes in your feature branch

Step 5: Now, click the Push button at the top of the window, select your feature branch, and then click OK to push your changes to the remote repository

Step 6: Verify your commits by checking the commit history in bitbucket to ensure that the commit you just made appears in the list.

Step 7: Navigate to the Pull Requests section and click on Create Pull Request to initiate the process of merging your feature branch into the main branch.

Step 8: Click on Create Pull Request

Step 9: You can assign your pull request to someone for review. Once it has been approved, you can click Merge to integrate your feature branch into the main branch.

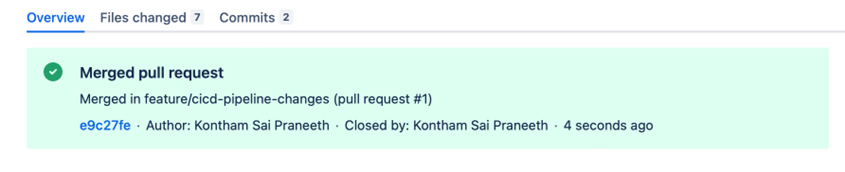
Step 10: After merging you can see this message prompt.
Step 11: Navigate to Repository Settings > (Pipelines) Settings, and then Enable Pipelines to activate the CI/CD functionality for your repository.

Step 12: Also, Navigate to Repository variables to define our variables declared in bitbucket-pipelines.yml, Go to your Bitbucket > Your Repository > Repository Settings > Repository variables and add credentials like the Anypoint Platform Connected App client ID and secret, or your username and password. These variables will be used during deployment.

Step 13: Also, add settings.xml in your Repository variables the settings.xml which we created earlier

Step 14: Now, return to your repository and go to the Pipelines tab. Click on Run Initial Pipelines to start the first execution of your configured pipelines

Step 15: Select your Branch and Pipeline and click Run

How to Verify and Monitor the Pipeline?
Step 1: Once the pipeline is running, monitor its progress in the Pipelines tab. Monitor the pipeline for any build or deployment issues by reviewing the logs and verifying that each step is completed successfully. This ensures your CI/CD setup is working as expected and helps identify and resolve any problems that occur during the build or deployment stages.
Step 2: Once your deployment is successful, you should see a Build Success message in the pipeline logs, indicating that the process was completed without errors.

Step 3: You can verify it by looking at the Runtime Manager in Anypoint Studio.

Step 4: You can also verify the application by sending a request via Postman to trigger and test the deployment.

So, whenever a branch is merged into the master or the specified branch in the bitbucket-pipelines.yml file, the pipeline will automatically trigger, apply the changes to the specified environment on Anypoint Platform, and redeploy the application accordingly.
What is Webhook?
-
- A webhook is a user-defined HTTP callback that allows one system to send real-time data to another system when a specific event occurs. It works by triggering an HTTP request (usually a POST request) to a pre-configured URL when the event is triggered. Webhooks are commonly used for integrating different systems or automating workflows.
-
- For example, in a CI/CD pipeline, a webhook can trigger an action, such as starting a build in Jenkins or sending a notification when code is pushed to a repository. They enable real-time communication between services and help avoid the need for constant polling.
How to generate a Webhook URL in Teams?
Step 1: Open Microsoft Teams, navigate to Apps, and add Workflows to your teams.
Step 2: Go to the Teams channel where you want to receive notifications.
Step 3: Click on the three dots menu (…) next to the channel’s name and select Workflows from the dropdown menu.

Step 4: In the Workflows window, search for “Post to a channel when a webhook request is received” template and click on it.

Step 5: Accept the necessary permissions if you create a workflow for the first time.

Step 6: Optionally, you can rename the workflow to provide a meaningful name. After, click on Next.

Step 7: Make sure that the Microsoft Teams Team and Channel are selected correctly, Then, Click Add Workflow

Step 8: Copy the generated webhook URL. This URL is unique to your webhook and will be used to send messages directly to the specific channel.

Step 10: Open the URL in the browser https://marketplace.atlassian.com/apps/1216365/advanced-microsoft-teams-bitbucket-connector?hosting=cloud&tab=overview to add the Microsoft teams Bitbucket connector. Click on “Get it now”
Step 11: Select the Workspace and click on Click on “Grant Access”
Step 12: Now, go to Bitbucket > Repository > Repository Settings > Settings (Microsoft Teams), and create a new webhook by pasting the URL you copied from Microsoft Teams.

Step 13: You should now receive a notification prompt in your Microsoft Teams channel whenever someone raises a pull request, merges code, or performs any other specified actions as defined in your webhook configuration.

You have successfully completed the setup and configuration of your CI/CD pipeline using Bitbucket, along with Microsoft Teams notification integration. Your pipeline is now ready for automated builds, tests, and deployments for your MuleSoft application, complete with real-time notifications in Teams.
Takeaway
Implementing the CI/CD pipeline with Bitbucket and Microsoft Teams notification integration streamlines MuleSoft’s deployment process. It ensures faster, automated builds, tests and deployments, reduces manual errors and saves time.
To learn about API integration and the MuleSoft deployment process go through the website of the best MuleSoft partner in UAE. mindX360 Technologies is performing DevOps best practices to improve business growth in Middle East region with extensive enterprise growth progress. The company has established a high and automated development process for MuleSoft applications. This approach ensures faster delivery, improved collaboration and seamless operations for their clients and contributes significantly to enterprise growth and strengthening businesses’ position in the digital transformation area.